
Hello,
As I was asked to write a post with simple Insert/Update/Delete screens using the same technology from my previous post here is what I came with. I've got to say that this is a very busy period in my life so I couldn't spend too much of my time writing this post but hopefully it wont affect the quality of the solution. The idea was to make this CRUD screens as a single page interface. We'll start from the project we've already made in the previous post. The source can be found here. First instead of going straight to the page as we did in previous post we'll build a home/welcome page with a simple menu where we can choose where we want to go (either the page we've built in the last post (TaxPayer) or the new page we are building now - Declaration). To go to the home by default we'll change RouteConfig and instead of TaxPayer controller we put Home.
Twitter bootstrap
To build a good design easily I will be using Twitter bootstrap. Actually I'll be using much more of the Twitter bootstrap than the nice styling (e.g. Modal plugin, menu,...) and I would recommend you to try it also. For those who doesn't know what the Twitter bootstrap is you can find out here. In simple words twitter bootstrap is a front-end framework with a set of predefined styles and bunch of java script plugins that can help you to build nice looking and efficient web app in a simple manner. To start we download twitter bootstrap, unzip it and add styles and javascript files to the project (both minified and developing version).

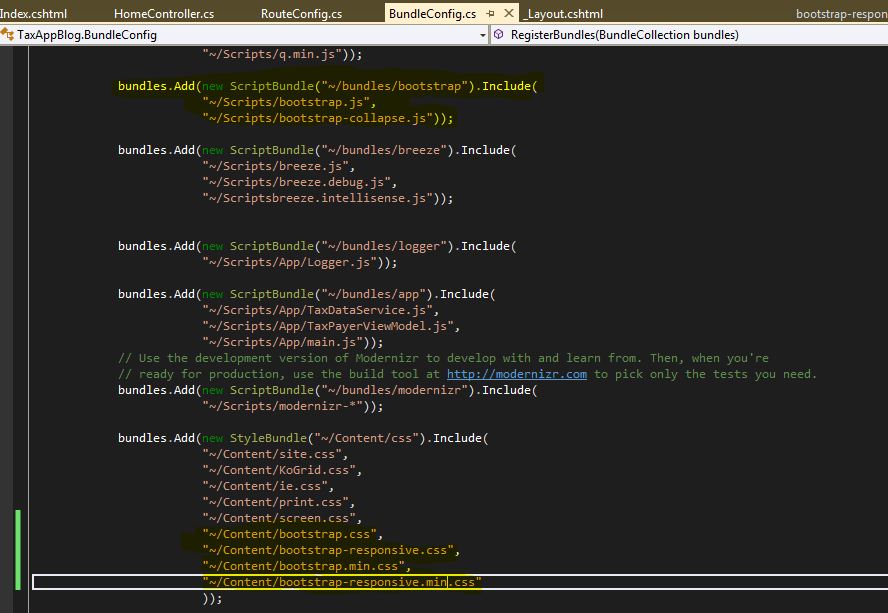
Then we add them to the bundle configuration file as we did in the previous post:
Build Menu
After this is done we'll edit our layout page and TaxPayer page (as we'll move out some of the javascript file that were referenced before in layout page but they are actually TaxPayer specific). After we do that our layout page looks like this:
 <!DOCTYPE html>
 <html>
 <head>
   <meta charset="utf-8" />
   <meta name="viewport" content="width=device-width" />
   <title>@ViewBag.Title</title>
   @Styles.Render("~/Content/css")
   @Scripts.Render("~/bundles/modernizr")
   @Scripts.Render("~/bundles/jquery")
   @Scripts.Render("~/bundles/logger")
   @Scripts.Render("~/bundles/bootstrap")
   @Scripts.Render("~/bundles/knockout")
   @Scripts.Render("~/bundles/koGrid")
   @Scripts.Render("~/bundles/q")
   @Scripts.Render("~/bundles/breeze")

 </head>
 <body>
     <div class="navbar navbar-fixed-top">
    <div class="navbar-inner">
     <div class="container">
      <a class="btn btn-navbar" data-toggle="collapse" data-target=".nav-collapse">
       <span class="icon-bar"></span>
       <span class="icon-bar"></span>
       <span class="icon-bar"></span>
      </a>
      <a class="brand" href="/">Babic's Tax Blog Application</a>
      <div class="nav-collapse">
       <ul class="nav">
        <li class="active"><a href="/">Home</a></li>
        <li class="dropdown">
         <a class="dropdown-toggle" data-toggle="dropdown" href="#">Maintenance<b class="caret"></b></a>
         <ul class="dropdown-menu">
           <li><a href="/TaxPayer">Tax Payer</a></li>
           <li><a href="/Declaration">Tax Declaration</a></li>
         </ul>
        </li>
        </ul>
      </div><!--/.nav-collapse -->
     </div>
    </div>
   </div>
   <article role="main">

     @RenderBody()
   </article>
   @RenderSection("scripts", required: false)
   <!-- Le javascript
   ================================================== -->
   <!-- Placed at the end of the document so the pages load faster -->
   <script>
     $().ready(function () {
       $('.dropdown-toggle').dropdown();
       $(".collapse").collapse();
       $(".alert").alert();
     });
   </script>
 </body>
 </html>
and TaxPayer looks like this:
 @{
   ViewBag.Title = "Index";
  }
  <!DOCTYPE html>
  <html>
  <body>
   <div id="body">
    <div id="imageWrapper" align="center">
     <img id="loader" src="images/ajax-loader.gif" data-bind="visible: hide()" />
    </div>
    <div id="gridWrapper" data-bind="visible: !hide()">
     <div id="sandBox" style="height: 200px;" data-bind="koGrid: { data: people,
      columnDefs: [{ field: 'FirstName', width: 100 },
           { field: 'FamilyName', width: 110 },
           { field: 'BirthDate', width: 100 },
           { field: 'Profession', width: 100 },
           { field: 'Telephone', width: 100 },
           { field: 'Address', width: 150 },
           { field: 'City', width: 100 },
           { field: 'Country', width: 100 },
           { field: 'Email', width: 150},
           { field: 'Twitter', width: 110 }
      ],
        autogenerateColumns: false,
        isMultiSelect: true,
        enablePaging: false }">
     </div>
    </div>
   </div>
 @Scripts.Render("~/bundles/app")
  </body>
  </html>
Now we change the Home/Index page and add background picture and we've got our home page and simple drop down menu :)

Server side
Finally we can start building our CRUD functionality. We'll be doing it for the Declaration screen. The Declaration screen contains declaration name, which year the declaration is valid for and declaration note do user can write note related to that declaration. After we added the table to the Entity Framework model, the diagram looks like:

Now we'll write some code to bring data from server to the client ( we'll go fast through this as we did exactly the same stuff in the previous blog). First we'll create Repostiory for Declarations.
IBreezeDeclarationRepository:
 using System;
 using System.Collections.Generic;
 using System.Linq;
 using System.Text;
 using System.Threading.Tasks;
 using Breeze.WebApi;
 using Newtonsoft.Json.Linq;

 namespace TaxAppBlog.Models.Contracts
 {
   public interface IBreezeDeclarationRepository
   {
     IQueryable<Declaration> Declarations { get; }
     string Metadata();
     SaveResult SaveChanges(JObject saveBundle);
   }
 }
BreezeDeclarationRepository:
 using System;
 using System.Collections.Generic;
 using System.Linq;
 using System.Web;
 using Breeze.WebApi;
 using Newtonsoft.Json.Linq;
 using TaxAppBlog.Models.Contracts;

 namespace TaxAppBlog.Models.Implementations
 {
   public class BreezeDeclarationRepository : IBreezeDeclarationRepository
   {
     readonly EFContextProvider<TaxEntities> _contextProvider =
   new EFContextProvider<TaxEntities>();
     public IQueryable<Declaration> Declarations
     {
       get { return _contextProvider.Context.Declarations; }
     }

     public string Metadata()
     {
       return _contextProvider.Metadata();
     }

     public SaveResult SaveChanges(JObject saveBundle)
     {
       return _contextProvider.SaveChanges(saveBundle);
     }
   }
 }
Notice that we have only one property - Declarations and one method - SaveChanges, Metadata is already explained in the previous post. SaveChanges method is coming out of box for the entity framework (EFContextProvider). The signature is JObject which is a JSON.NET representation of the change-set data. How this works we'll see more later but simple explanation would be: The Breeze EntityManager tracks entities and it tracks all the changes. When we call saveChanges , the manager will send it to the controller's
SaveChanges method and controller through repository calls EFContextProvider SaveChanges. Before we create controller we'll tell to our DI container to inject anything that implements our new repository interface (AutofacConfig):

Now we are ready to build our Breeze Controller:
 using System;
 using System.Collections.Generic;
 using System.Linq;
 using System.Net;
 using System.Net.Http;
 using System.Web.Http;
 using Breeze.WebApi;
 using Newtonsoft.Json.Linq;
 using TaxAppBlog.Models;
 using TaxAppBlog.Models.Contracts;
 namespace TaxAppBlog.Controllers
 {
   [BreezeController]
   public class BreezeDeclarationController : ApiController
   {
     IBreezeDeclarationRepository repository;
     public BreezeDeclarationController(IBreezeDeclarationRepository repository)
     {
       this.repository = repository;
     }

     public IQueryable<Declaration> GetDeclarations()
     {
       return repository.Declarations;
     }

     // ~/api/BreezePeople/Metadata
     [HttpGet]
     public string Metadata()
     {
       return repository.Metadata();
     }

     [HttpPost]
     public SaveResult SaveChanges(JObject saveBundle)
     {
       return repository.SaveChanges(saveBundle);
     }
   }
 }
Client side
We are pretty much done with the server side so lets go and create ViewModel on the client. This time I won't separate breeze and Knockout in two files (as I did in the previous post) but put altogether in one. I will start with only getting Declarations and then adding bit by bit of CRUD functionality (you'll see it's nice and simple). At the begining view model will expose only GetDeclarations and SaveChanges (see below).
DeclarationViewModel.js
(function (root) {
   var breeze = root.breeze,
     ko = root.ko,
     app = root.app = root.app || {};
   Logger.show();        // show logger initially
   log("Window is loaded.");

   // define Breeze namespace
   var entityModel = breeze.entityModel;

   // service name is route to the Web API controller
   var serviceName = 'api/BreezeDeclaration';

   // manager is the service gateway and cache holder
   var manager = new entityModel.EntityManager(serviceName);

   // define the viewmodel
   var vm = {
     declarations: ko.observableArray(),
     save: saveChanges
   };

   // start fetching Declarations
   getDeclarations();

   // bind view to the viewmodel
   ko.applyBindings(vm);

   function getDeclarations() {
     log("querying Declarations");
     var query = entityModel.EntityQuery.from("GetDeclarations");
     return manager
       .executeQuery(query)
       .then(querySucceeded)
       .fail(queryFailed);

     // clear observable array and load the results
     function querySucceeded(data) {
       log("queried Declarations");
       vm.declarations.removeAll();
       var declarations = data.results;
       declarations.forEach(function (declaration) {
         vm.declarations.push(declaration);
       });
     }
   };

   function saveChanges() {
     return manager.saveChanges()
       .then(function () { log("changes saved"); })
       .fail(saveFailed);
   }

   function queryFailed(error) {
     log("Query failed: " + error.message);
   }

   function saveFailed(error) {
     log("Save failed: " + error.message);
   }

 }(window));
Add the DeclarationViewModel to the BundleConfig ( bundles.Add(new ScriptBundle("~/bundles/declaration").Include("~/Scripts/App/DeclarationViewModel.js"));). Now we create mvc controller DeclarationController and its view Index (both are very simple).
Index.cshtml
@{
   ViewBag.Title = "Tax Declarations";
 }
 <!DOCTYPE html>
 <html>
 <body>
   <table id="taxDeclarations" class="table table-striped table-hover table-condensed">
     <thead>
       <tr>
         <th>Declaration Name</th>
         <th>Declaration Year</th>
         <th>Declaration Note</th>
       </tr>
     </thead>
     <tbody id="declarationList" data-bind="foreach: declarations">
       <tr>
         <td>
           <span style="color: darkgrey; font-size: 10pt; font-weight: bold" data-bind="text : DeclarationName"></span>
         </td>
         <td>
           <span style="color: darkgrey; font-size: 10pt; font-weight: bold" data-bind="text : DeclarationYear"></span>
         </td>
         <td>
           <span style="color: darkgrey; font-size: 10pt; font-weight: bold" data-bind="text : DeclarationNote"></span>
         </td>
         <td>
           <button class="declarationDeleter btn btn-danger">
             Delete
           </button>
         </td>
       </tr>
     </tbody>
   </table>
   @Scripts.Render("~/bundles/declaration")
 </body>
 </html>
Add New Declaration
So the idea is that when the user clicks on button "Add Declaration" the modal window will pop up and let user to fill in the form and save it. In the View Model we'll expose the observable entity newDeclaration and the method addDeclaration. The observable newDeclaration will be bound on the controls on the modal window. The function addDeclaration would create breeze entity based on the newDeclaration, push it to the observable list and call save method. So we add the following markup to the declaration/index view:
   <div class="pull-right">
     <a id="new-taxDeclaration" class="btn btn-success"
       data-toggle="modal" href="#taxDeclaration-modal">Add Declaration</a>
   </div>
   <div class="modal hide fade" id="taxDeclaration-modal">
     <div class="modal-header">
       <button type="button" class="close"
         data-dismiss="modal">
         ×</button>
       <h3>tax Declaration</h3>
       <div class="row offset1">
         <p>
           <label>Declaration Name</label>
           <input type="text" data-bind="value :newDeclaration().DeclarationName" />
         </p>
         <p>
           <label>Declaration Year</label>
           <input type="text" data-bind="value :newDeclaration().DeclarationYear" />
         </p>
         <p>
           <label>Declaration Note</label>
           <textarea data-bind="value :newDeclaration().DeclarationNote"></textarea>
         </p>
       </div>
       <div class="modal-footer">
         <a href="#" data-dismiss="modal" class="btn btn-primary declarationAdd" data-bind="click : addDeclaration">Save</a>
         <a href="#" data-dismiss="modal" class="btn">Cancel</a>
       </div>
     </div>
   </div>
As mentioned above in the viewmodel we expose newDeclaration and AddDeclaration:
  // define the viewmodel
   var vm = {
     declarations: ko.observableArray(),
     save: saveChanges,
     newDeclaration: ko.observable(
       {
         DeclarationName: "",
         DeclarationYear: "",
         DeclarationNote: ""
       }),
     addDeclaration: addNewDeclaration
   };

   function addNewDeclaration() {
     var item = createDeclaration({
       DeclarationName: vm.newDeclaration().DeclarationName,
       DeclarationYear: vm.newDeclaration().DeclarationYear,
       DeclarationNote: vm.newDeclaration().DeclarationNote
     });
     vm.declarations.push(item);
     vm.save();
   };

   function createDeclaration(newDeclaration) {
     return manager.createEntity('Declaration', newDeclaration);
   };
And now we can create new Declaration :)

This is all good but we are kind of back to old days where you've got button click handler on your form (view) and we don't want that, we want to be unobtrusive :). First in the Index view remove the data binding on the button "declarationAdd" (data-bind="click : addDeclaration") then in the view model attach the handler on the button click using the JQuery .delegate().

This is all good but we are kind of back to old days where you've got button click handler on your form (view) and we don't want that, we want to be unobtrusive :). First in the Index view remove the data binding on the button "declarationAdd" (data-bind="click : addDeclaration") then in the view model attach the handler on the button click using the JQuery .delegate().
   $(document).delegate(".declarationAdd", "click", function () {
     log("Adding New");
     vm.addDeclaration();
   });
Edit/Update Declaration
To edit declaration I'll be using twitter bootstrap modal dialog again. When user double-click on the declaration name the modal dialog will appear (Bootstrap makes it really easy for us when it comes to the modal windows. Initially the modal window is hidden and to show it we can use either a link or the button. You can activate modal windows in two ways: by using data attributes or using java script. Here I am using java script....) and after changing whatever needs to be changed, the user can save it to the database or cancel the changes.
In the view we change the table cell for declaration name - it becomes:
 <td class='value editable'>
           <div class="editor modal hide">
             <div class="modal-header">
               <h3>Edit Children</h3>
             </div>
             <div class="row offset1">
               <p>
                 <label>Declaration Name</label>
                 <input type="text" data-bind="value :DeclarationName" />
               </p>
               <p>
                 <label>Declaration Year</label>
                 <input type="text" data-bind="value :DeclarationYear" />
               </p>
               <p>
                 <label>Declaration Note</label>
                 <textarea data-bind="value :DeclarationNote"></textarea>
               </p>
             </div>
             <div class="modal-footer">
               <a href="#" data-dismiss="modal" class="btn declarationCancel">Cancel</a>
               <a href="#" data-dismiss="modal" class="btn btn-primary declarationSaver">Save</a>
             </div>
           </div>
           <span style="color: darkgrey; font-size: 10pt; font-weight: bold" data-bind="text : DeclarationName"></span>
         </td>
Again we want to be unobtrusive ;). In the view model we'll expose the method editDeclaration the we'll attach handlers for showing modal window, saving and cancelling changes.
The ViewModel and the editDeclaration function would look like this:
  var vm = {
     declarations: ko.observableArray(),
     save: saveChanges,
     editDeclaration: editDeclaration,
     newDeclaration: ko.observable(
       {
         DeclarationName: "",
         DeclarationYear: "",
         DeclarationNote: ""
       }),
     addDeclaration: addNewDeclaration
   };

   function editDeclaration(declaration) {
     declaration.entityAspect.setModified();
     vm.save();
   }
We mark the entity to an EntityState of 'Modified'. Here I am not sure that I should be doing it manually but really have no time to investigate further. If someone finds better way please let me know. Now we can add the code for our handlers:
  $("#declarationList").delegate(".editable", "dblclick", function () {
     $(".modal", this).modal();
   });
   $("#declarationList").delegate(".declarationSaver", "click", function () {
     log("sad ga lomi...:)");
     var declaration = ko.dataFor(this);
     vm.editDeclaration(declaration);
   });

   $("#declarationList").delegate(".declarationCancel", "click", function () {
     log("cancel");
     var declaration = ko.dataFor(this);
     declaration.entityAspect.rejectChanges();
   });
Delete Declaration
And the last thing we are going to do in this exercise is to delete declaration. In the Index view in the table we already added the button to delete declaration (declarationDeleter) and in the ViewModel we'll expose the method deleteDeclaration then we'll attach handler for deleting the Declaration (remember - be unobtrusive). The ViewModel and the deleteDeclaration function would look like this:
  var vm = {
     declarations: ko.observableArray(),
     save: saveChanges,
     deleteDeclaration: deleteDeclaration,
     editDeclaration: editDeclaration,
     newDeclaration: ko.observable(
       {
         DeclarationName: "",
         DeclarationYear: "",
         DeclarationNote: ""
       }),
     addDeclaration: addNewDeclaration
   };

   function deleteDeclaration(declaration) {
     declaration.entityAspect.setDeleted();
     vm.declarations.remove(declaration);
     vm.save();
   }
Here as well I needed to "announced" that my entity is for deletion. This is the same thing as above for the modified entity.
We mark the entity to an EntityState of 'Deleted' and entity is scheduled for deletion during the next Save call.
On the end you see it is very easy to build CRUD with knockout, breeze, asp.net mvc4, twitter bootstrap, autofac,... The performances should always be good as the only communication back to the server is to save stuff to the database. I will mention once again that this is not production code (far from it: no validation, etc...)
Here you can find the small video of what we have built in this blog post.
The source code with all the changes from this post you can find in the github (commit from 21st May 2013) => here
Hi, Thank you very much for this very useful article. I have downloaded and run the code. However, the modal for will not come up when trying to insert a new record. I have looked in the code but could not see the reason why. Any ide?
ReplyDeleteAre you using Firefox browser? Try using IE!
ReplyDeleteThanks, both of these posts were helpful. I hope you're still alive ;p
ReplyDelete